Settings
Non-messaging settings for the PwrAgent desktop app. Messaging configuration lives under each provider page — see Messaging → Providers.
Everything below is reachable from Settings in the desktop app. The left-nav layout is roughly:
- General — desktop-wide defaults (image-paste budget, quit confirmation, update controls, etc.).
- Applications — terminal, editor, git,
ghCLI. - Profiles — PwrAgent profile management; see Desktop → Multiple profiles.
- Archived threads — restore threads you archived; grouped by project.
- Thread Management — copy or move Codex threads between Codex profiles.
- Worktrees — where worktrees get stored.
- Messaging — per-provider config; see Messaging → Setting up providers.
- Models — Codex App Server discovery, version, Codex auth profile selection.
- AI Providers — Codex plus every ACP coding-agent backend (Gemini, Kimi, Grok CLI, Qwen) on one screen: install, pin, disable.
- Experimental — opt-in features that are still in flux.
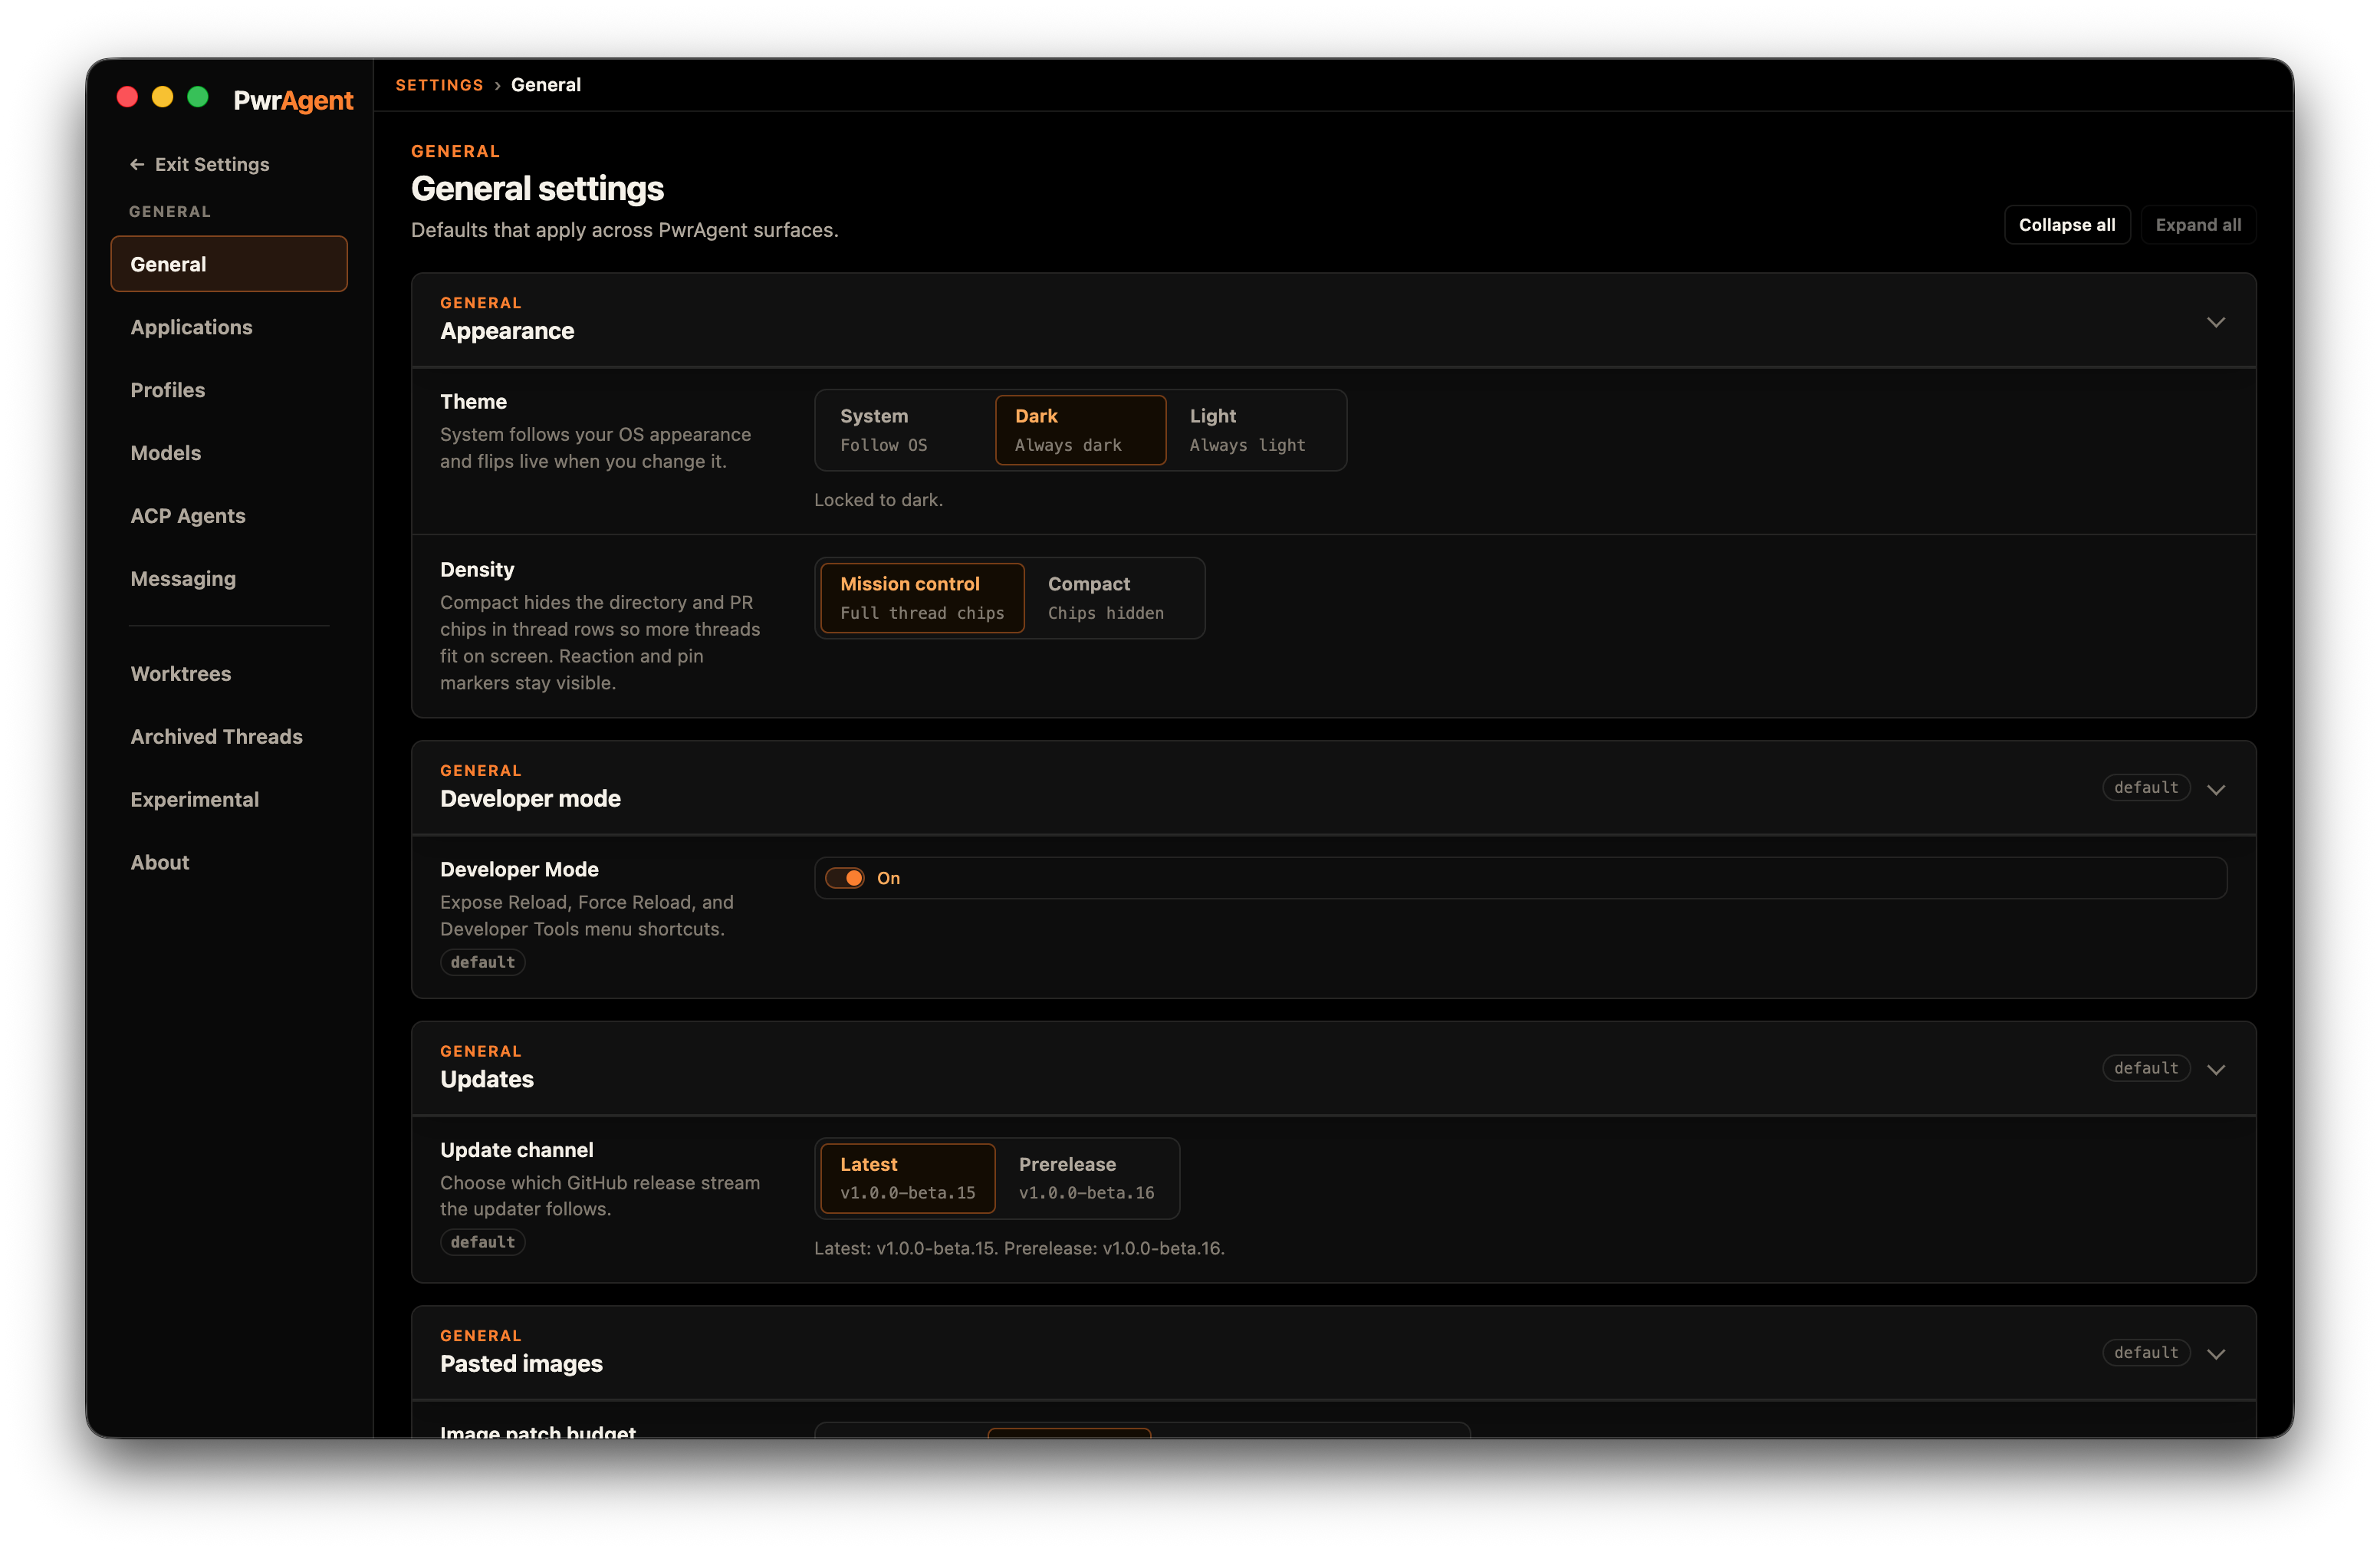
General
Desktop-wide defaults that don’t fit anywhere more specific:
- Appearance — theme (dark / light / system) and density (mission-control / compact); the same pair the onboarding wizard sets, changeable any time.
- Quit confirmation — the app asks before quitting while threads are mid-turn, sends are queued or scheduled, or integrated terminals are running. Opt out here.
- Notifications — the opt-in for native attention notifications.
- Updates — check for updates and (on macOS) restart-to-update from inside the app.
- Pasted images — patch budget (below).
- Messaging acknowledgment — the acknowledgement state behind the onboarding wizard’s messaging step.
- Developer mode — unlocks diagnostics: renderer CPU
profiling capture (works in packaged builds, saves
.cpuprofileartifacts), bounded heap snapshots, and copyable process IDs for chasing idle resource usage.
Pasted images — patch budget
When you paste a large image into the composer (a screenshot, a diagram, a photo from your clipboard), PwrAgent resizes it before forwarding to the model so it costs a predictable amount of context. Images are converted into model-token-friendly 32×32 pixel patches; this setting caps the patch count before per-model multipliers apply.
Pick the budget based on the typical fidelity you need. Most screenshots read fine at the default; bump it up when the model needs to read small text (UI labels, code snippets in screenshots, tiny CLI output). Drop it down if you regularly paste enormous images and want to keep the per-turn token cost low.
| Option | What it means |
|---|---|
1024 patches |
Caps square images at about 1024 32px patches before model-specific multipliers. |
1536 patches (default) |
Limits large pasted images to roughly 1536 image patches. Sensible balance for typical screenshots. |
4096 patches |
Allows roughly a 2048×2048 square image before model-specific multipliers. |
Actual size |
Preserves pasted image dimensions before upload. |
The same patch budget affects messaging-side image attachments similarly. See Using Codex via Messaging → Image upload profile for the messaging-side knob.
Application discovery
PwrAgent shells out to several command-line tools you’ve already installed. On launch it discovers:
| Tool | Used for |
|---|---|
| Terminal | Opening the thread’s workspace in a terminal window. macOS picks from Terminal.app, iTerm2, Ghostty, Warp, kitty, Alacritty, WezTerm, Hyper, and a few more. Linux discovers gnome-terminal, konsole, xterm, etc. |
| Editor | Opening the workspace and individual file:line jumps in your IDE / editor. macOS discovery covers VS Code, Cursor, Zed, Sublime, JetBrains’ IntelliJ IDEA (and the rest of the IntelliJ family — PyCharm, WebStorm, GoLand, RubyMine, …), Vim, Emacs. Linux discovery covers the same editors where their Linux builds register a launcher (code, cursor, zed, subl, the JetBrains shell scripts, vim, emacs, etc.). |
git |
Repository inspection, worktree creation, branch metadata. |
gh CLI |
GitHub-specific actions (PR numbers in sidebar filters, etc.). |
If the auto-discovery picks the wrong binary or doesn’t find one, override the path in Settings → Applications. Paths are per-tool; an explicit value beats the auto-discovered one.
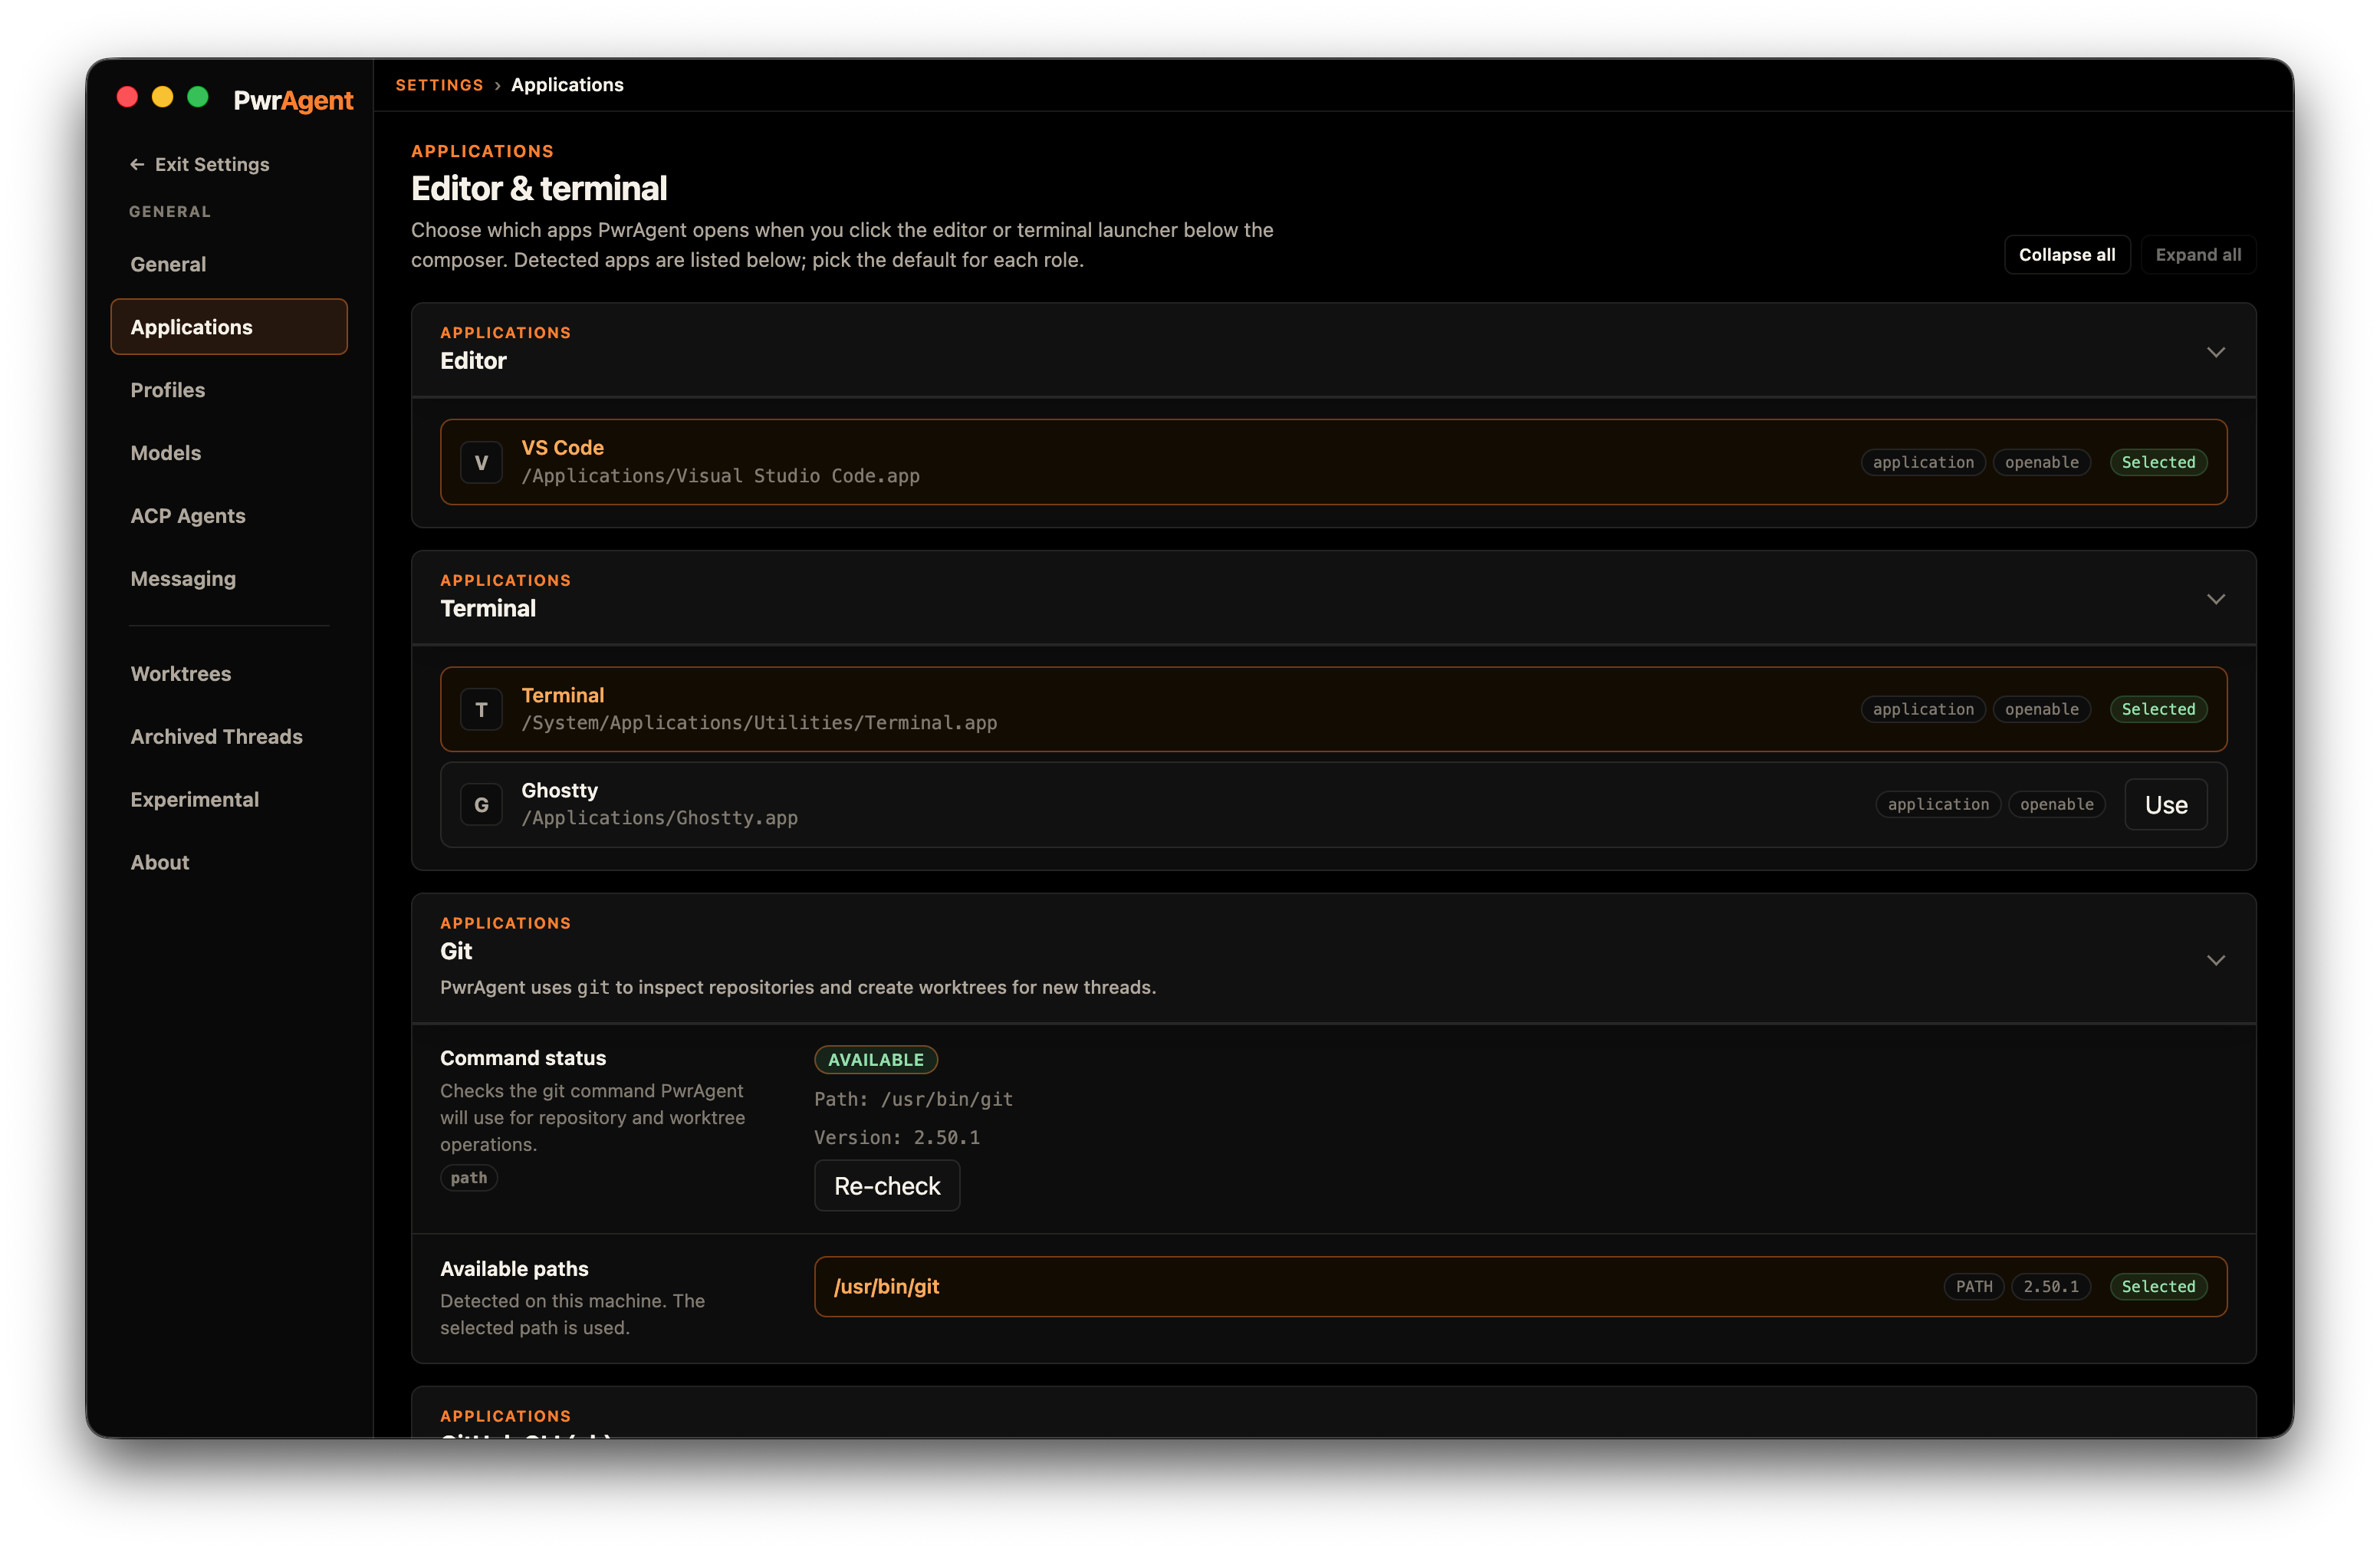
git, and gh CLI paths. A green status indicator next to each row means the tool was found.Codex App Server discovery is its own beast — see Models / Codex App Server below.
Profiles
PwrAgent has two profile mechanisms — PwrAgent profiles (this
panel) for desktop-app state and Codex auth profiles (under
Models / Codex App Server) for
isolating Codex CODEX_HOME directories. Both compose; see
Desktop → Multiple profiles for
the full conceptual model.
The Profiles panel lets you list, create, switch between, and delete PwrAgent profiles. Each row shows the on-disk profile dir, the Codex auth profile bound to it, and which one’s active / configured to launch by default.
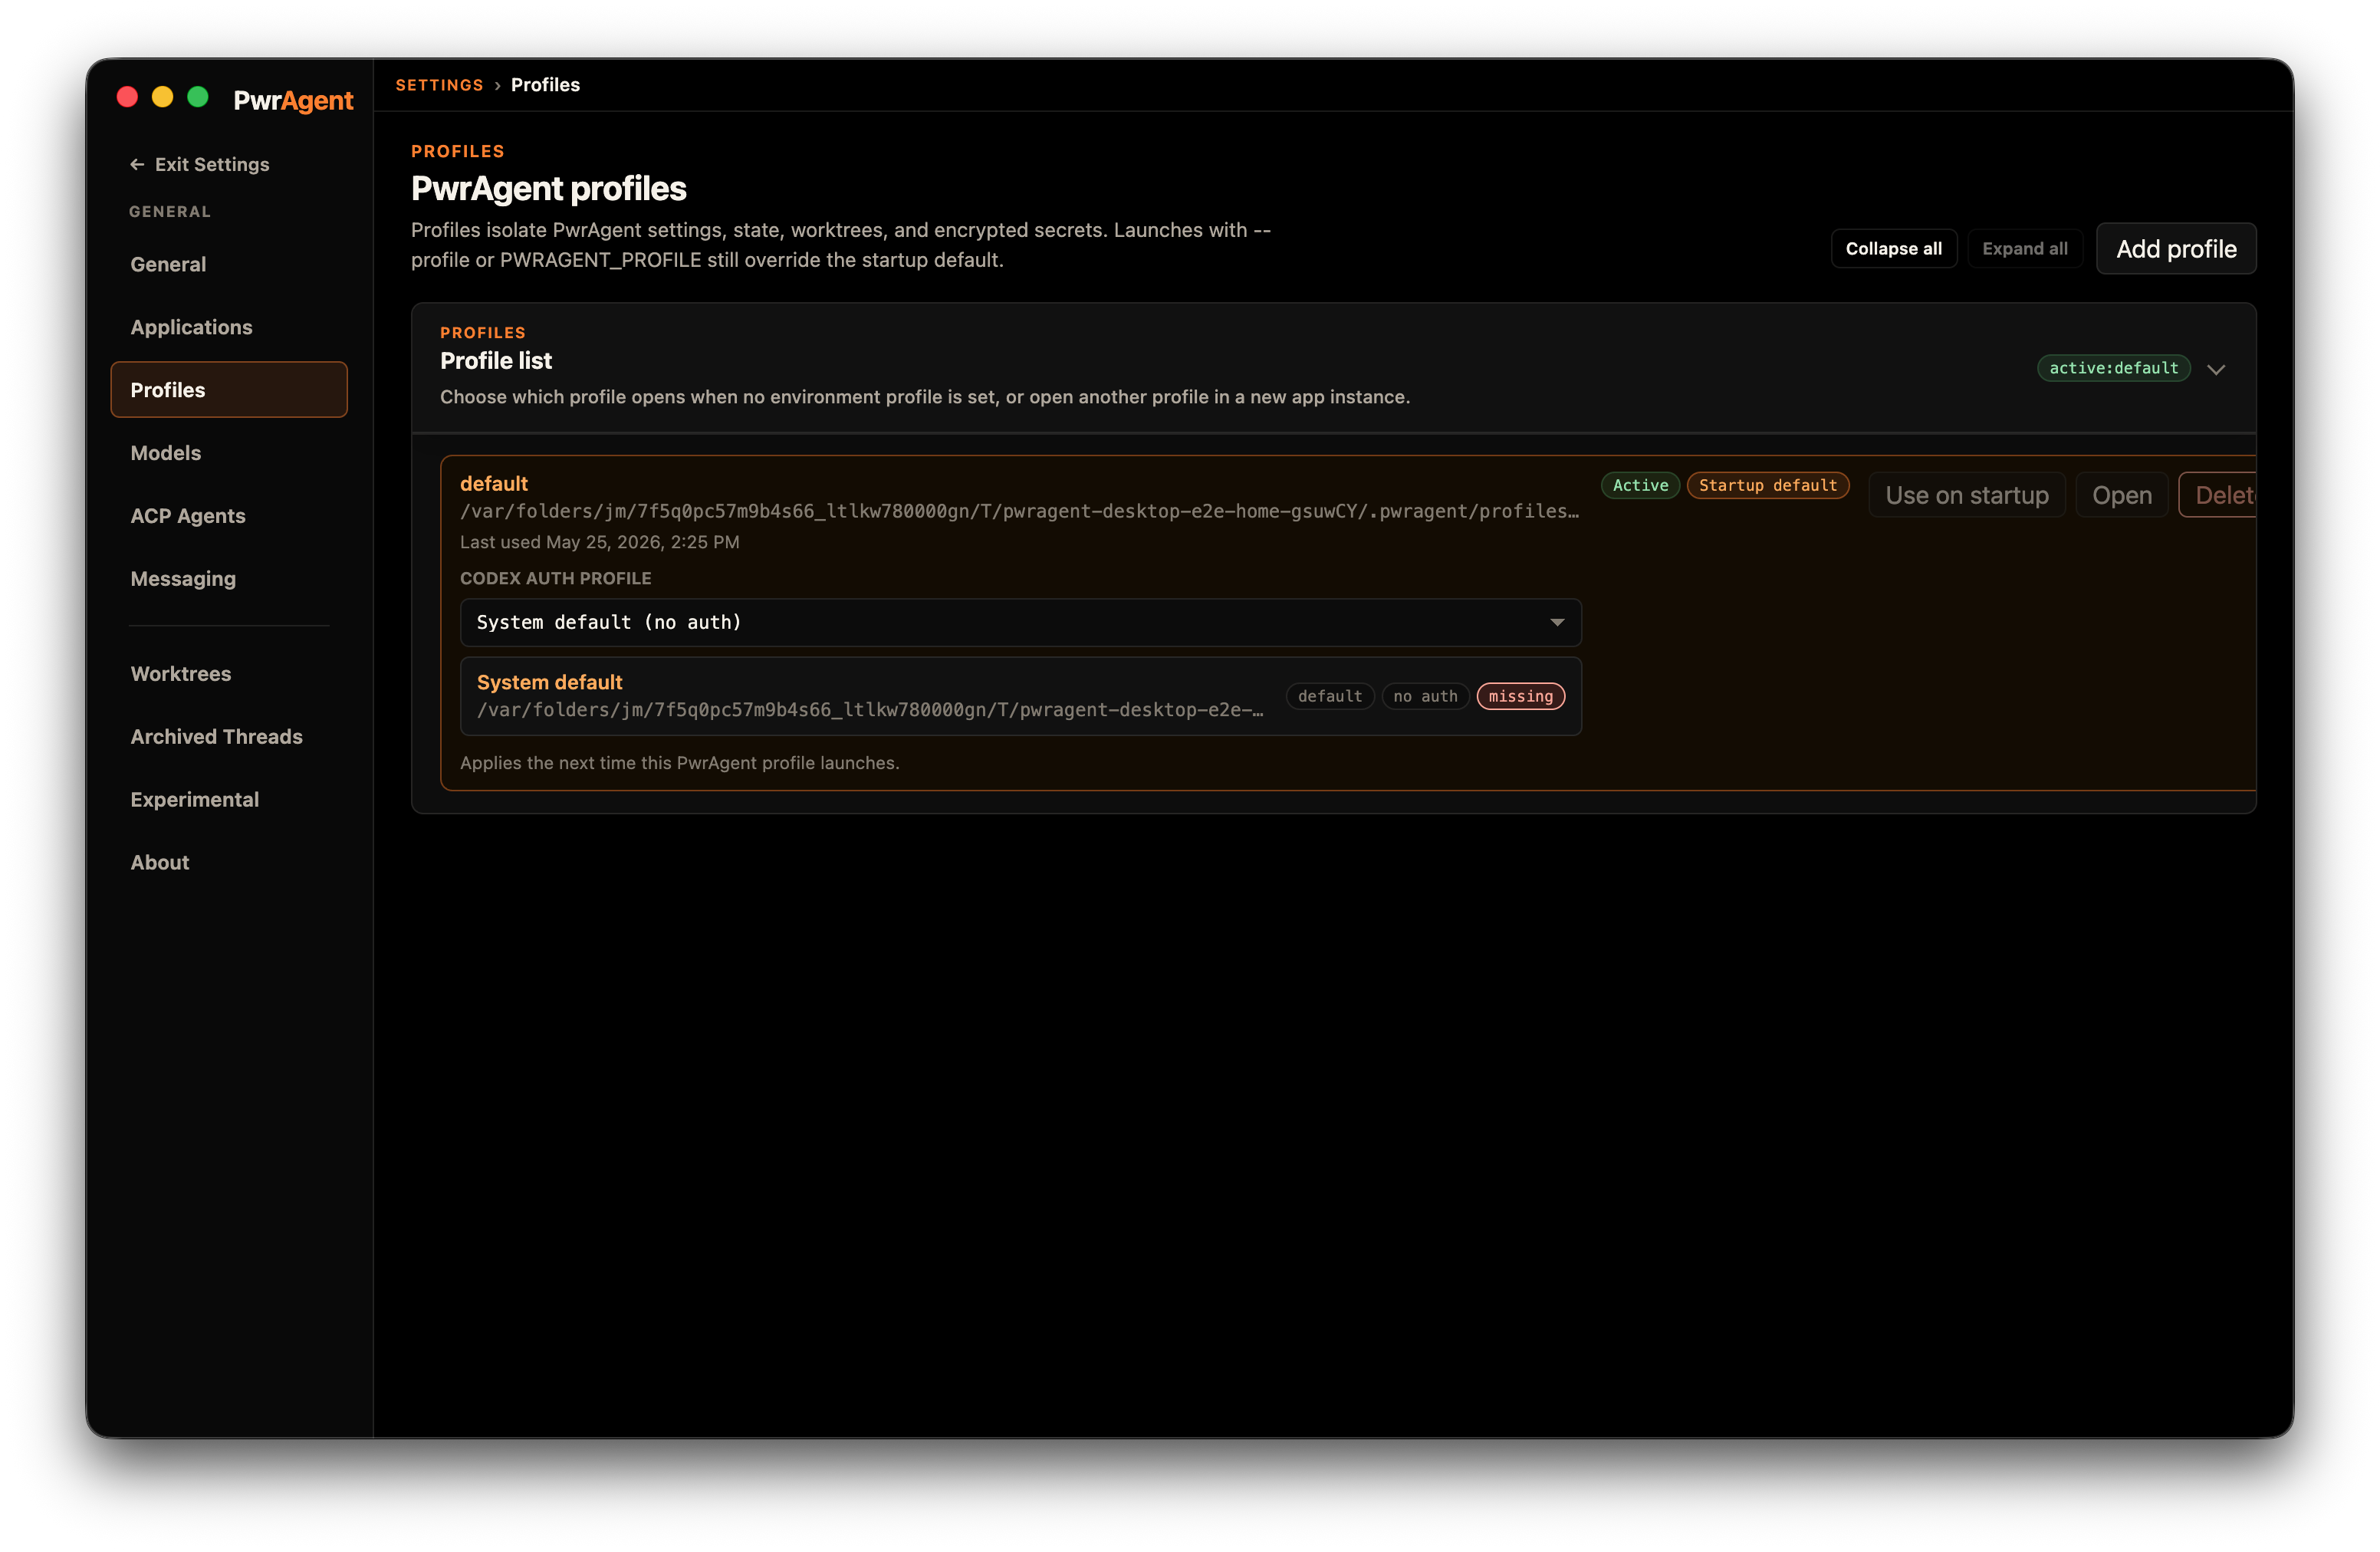
~/.pwragent/profiles/<name>/ directory and switches to it on next launch.Launches via --profile <name> (or PWRAGENT_PROFILE=<name>)
still override the startup default — see
Desktop → Launching a profile from the command line
for the CLI launch flag.
Archived threads
Threads you archive disappear from the sidebar but stick around on disk — Settings → Archived Threads is where you go to restore them.
Threads are grouped by project folder. Within each project, archived rows sort by most-recently-archived first, capped at 20 threads per project to keep the list scannable. Each row carries the thread’s title, the branch it last lived on, the date it was archived, and a Restore button that puts the thread back in the active list (back to whichever workspace — Local or Worktree — it was in when it was archived).
The grouping is resilient to older corrupted managed-worktree rows
— paths like ~/.codex/worktrees/<id>/PwrSnap collapse back under
the PwrSnap project header instead of fragmenting one section per
worktree id.
The list is scoped to the active PwrAgent profile. Switching profiles (Settings → Profiles, or the Profiles app menu) shows only that profile’s archived threads.
Thread Management
Settings → Thread Management moves Codex threads between Codex auth profiles — the escape hatch for “I started this in the wrong profile” or for splitting a shared profile into work / personal.
Pick the source Codex profile, select threads, and Copy or Move them into the target profile. Transfers are validated by replaying the thread’s history into the target before anything is removed from the source, and archived threads are safeguarded along the way. After a move, the thread shows up in the target profile’s list the next time you’re running under it.
Worktrees
PwrAgent stores managed worktrees outside of your repo so they
don’t clutter your working checkout. The default storage location
is ~/.pwragent/worktrees/.
You can change the location in Settings → Worktrees → Worktree
storage location. Pick a path on the same filesystem as your
repos — git worktree requires that, and putting the storage on a
different volume will produce surprising errors at handoff.
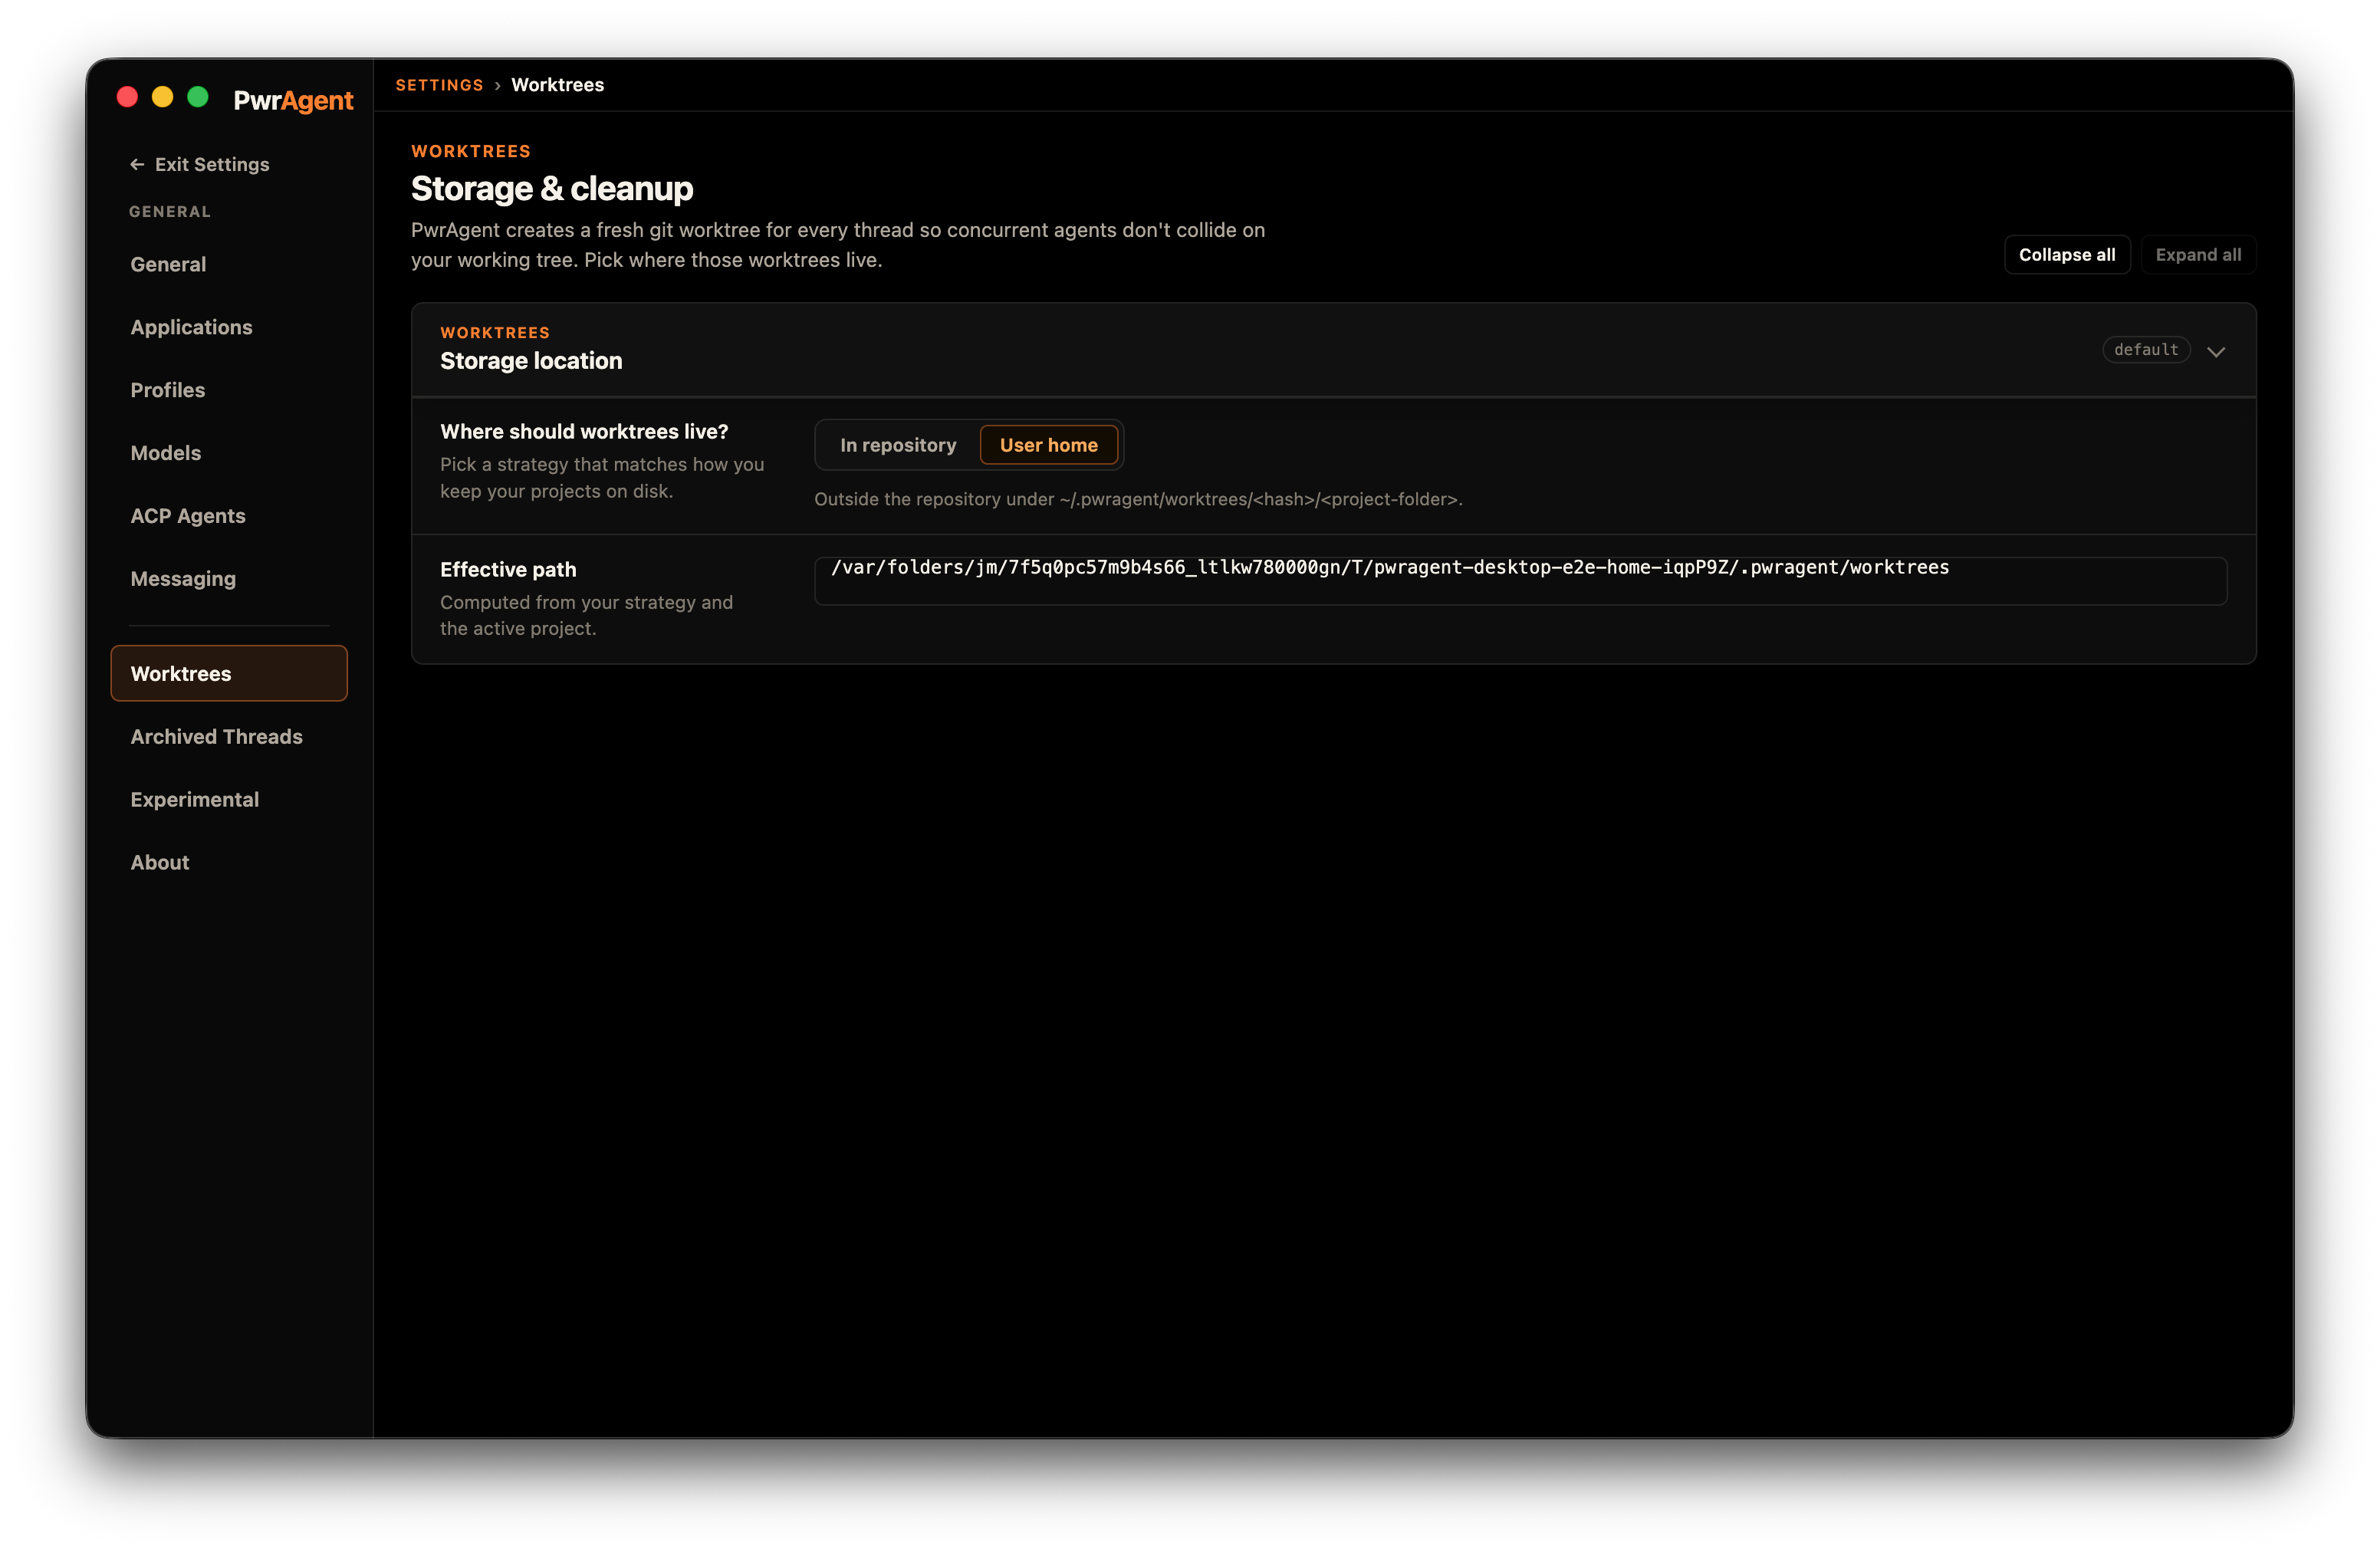
~/.pwragent/worktrees/). Change to any path on disk if you want them somewhere else.When PwrAgent creates a worktree for a thread, it lands at
<worktree-storage>/<hash>/<project-folder-name> where <hash> is
a short timestamp-derived directory. You’ll see the full path on
the thread’s status card.
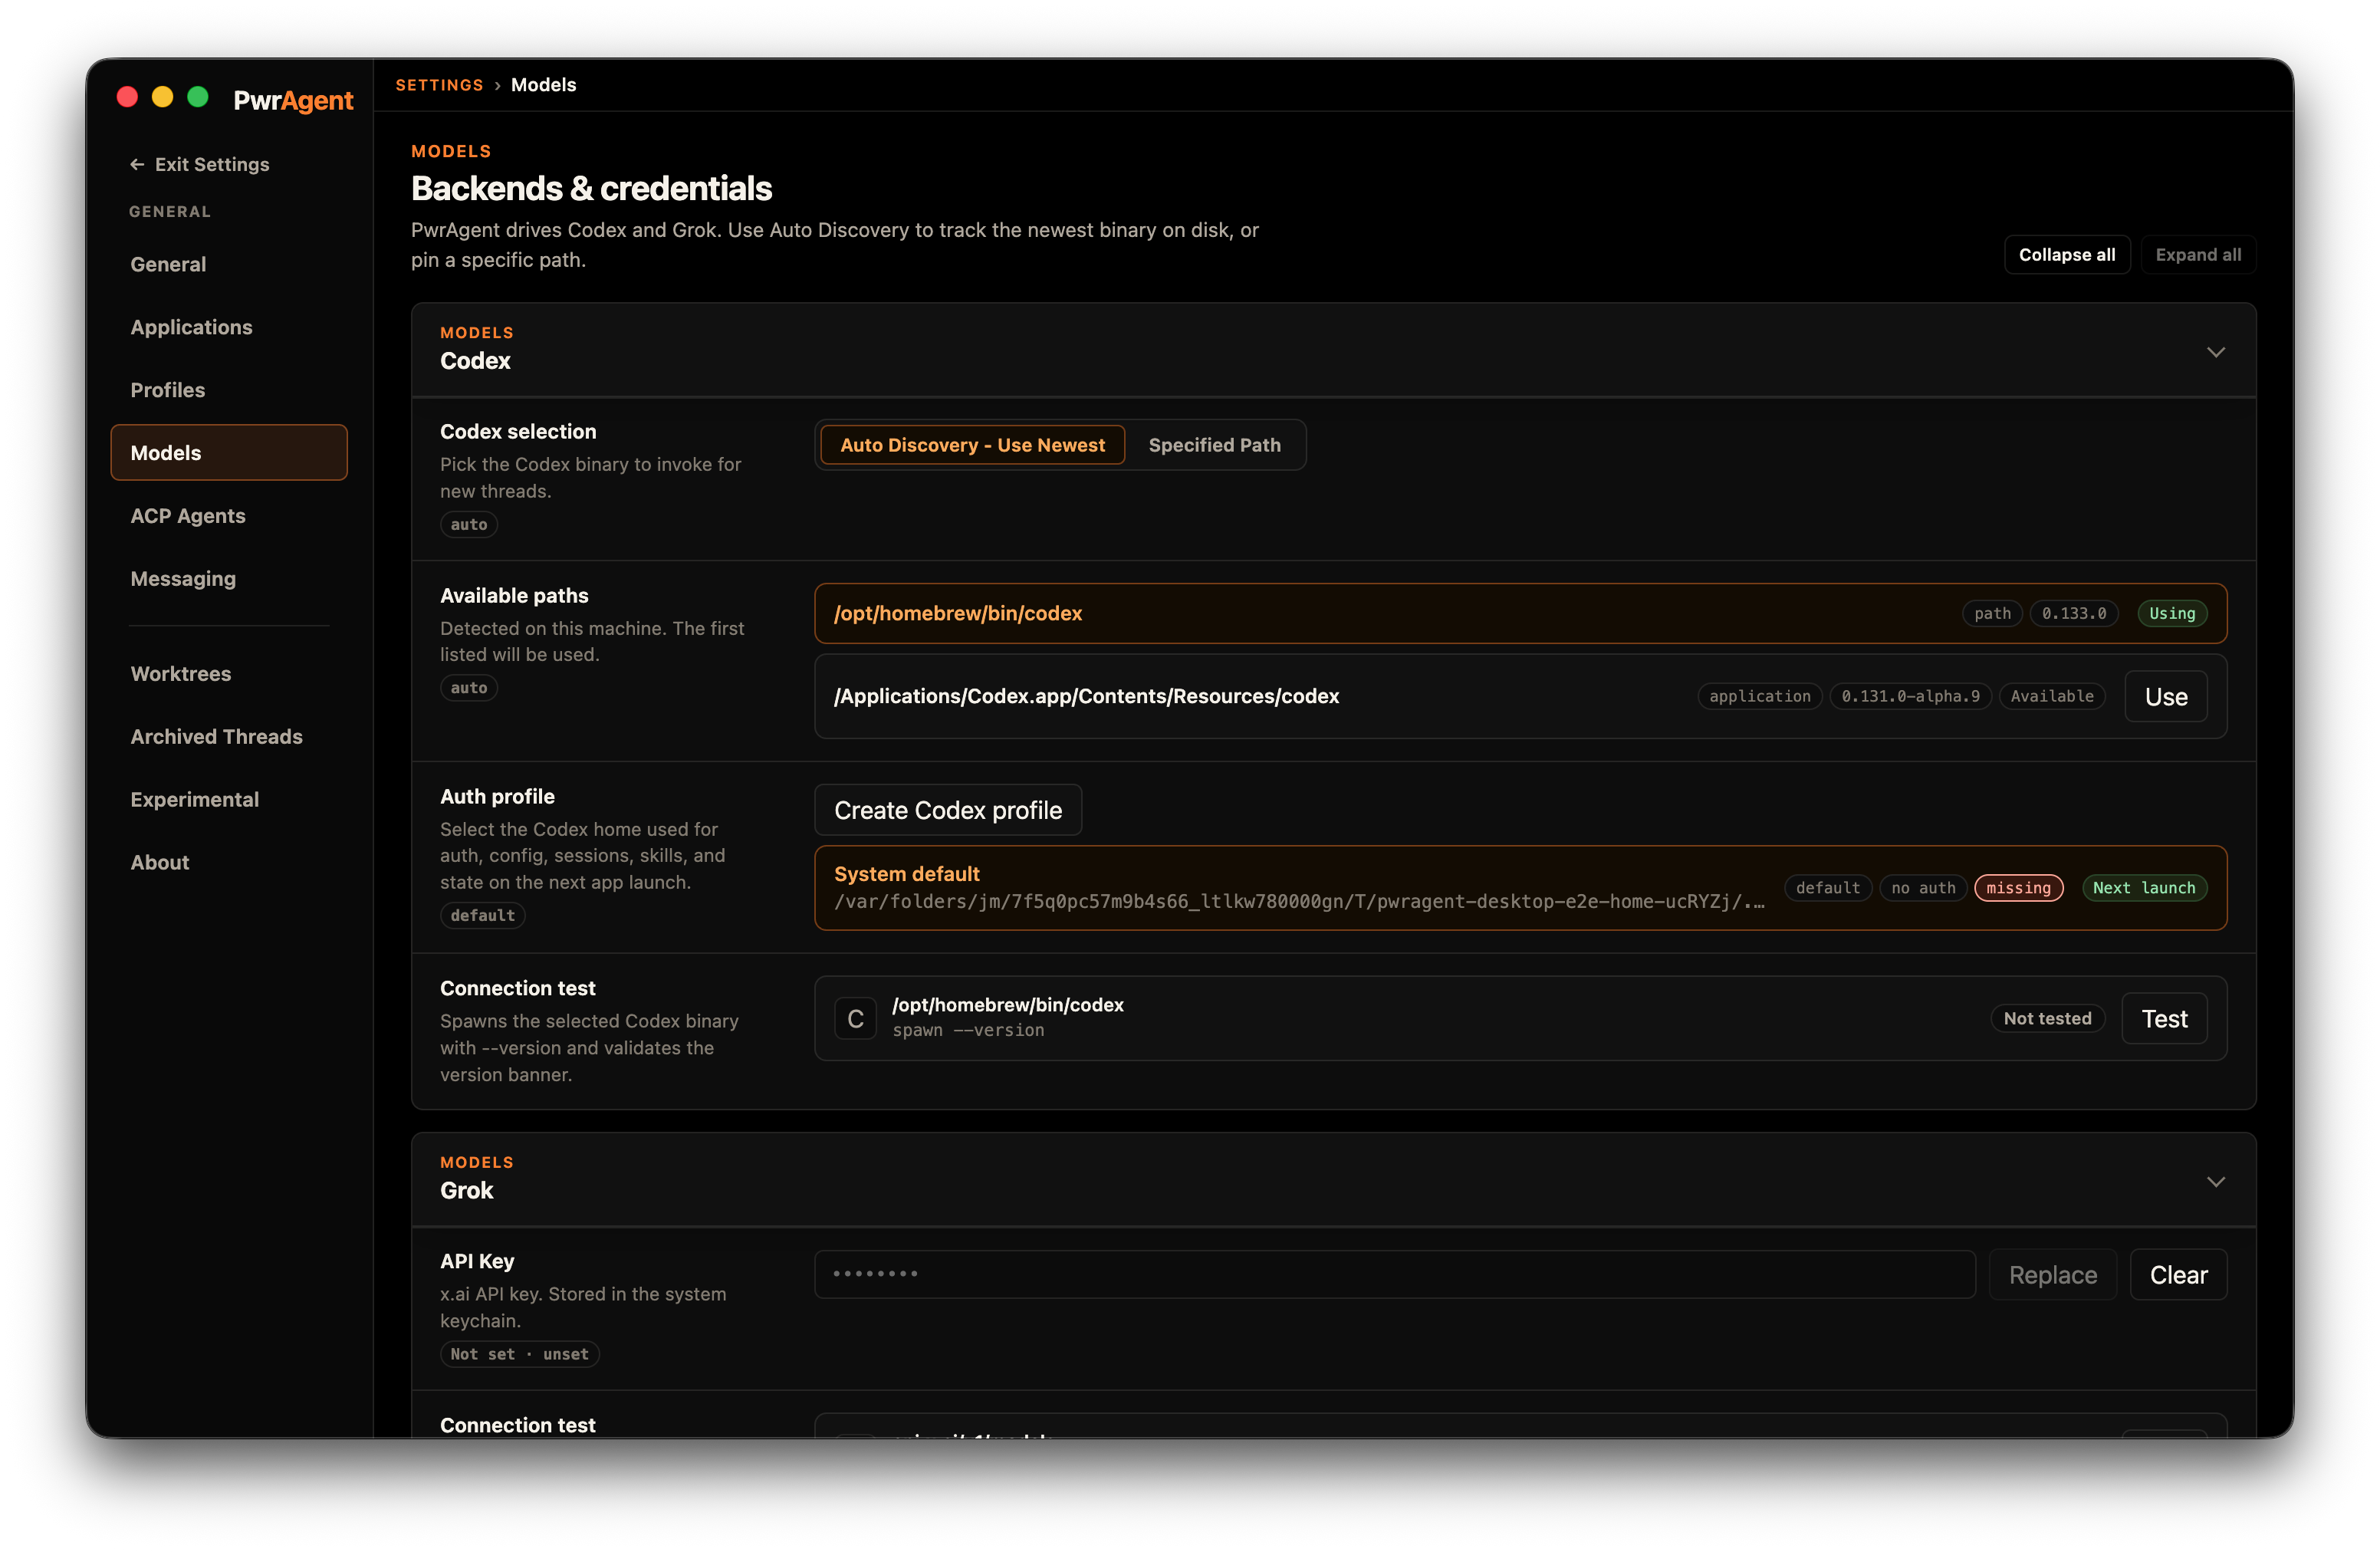
Models / Codex App Server
PwrAgent is a client of Codex App Server — it doesn’t ship its own copy. The desktop discovers Codex App Server from any of:
- Codex Desktop (the official Codex desktop app, if you have it installed — found even if you renamed the ChatGPT.app bundle).
- Homebrew-installed Codex CLI (
brew install codexor equivalent — found even when the launching shell has a sparsePATH). - Other Codex CLI install paths PwrAgent knows to check.
On launch, PwrAgent scans those sources, picks the newest working version it finds, and uses that as the Codex App Server backing your threads. The version currently in use is shown in Settings → Models — same panel where you’d verify which models are available and which one PwrAgent thinks you’re logged into.
Keeping the App Server up to date
Because PwrAgent uses the newest working install it finds, it inherits whatever updates you apply to the underlying Codex installation. That means:
- If you never run Codex Desktop (and don’t update via the CLI path), your PwrAgent stays pinned at whatever Codex App Server version was current when you last updated either source.
- The most reliable way to keep PwrAgent current is to run Codex Desktop periodically and let it self-update.
- If you do all your dev in PwrAgent and never open Codex Desktop,
consider updating the Codex CLI instead —
brew upgrade codexon Homebrew, or whatever your install path’s update mechanism is.
Either source on its own is fine. You don’t need to keep both current; PwrAgent picks whichever is newest at launch.
Authentication
PwrAgent does not ship its own Codex authentication flow. It piggybacks on whatever Codex auth state your underlying install has.
If you need to log out and back in, or your tokens have expired and PwrAgent shows you signed out:
- Open Codex Desktop.
- Sign in / re-authenticate there.
- Restart PwrAgent (or wait for it to pick up the refreshed credentials).
There’s no equivalent flow in PwrAgent’s UI — by design, since duplicating the auth state would mean it could diverge from Codex Desktop’s truth.
Testing the connection
The Test button in Settings → Models calls the discovered Codex App Server’s health endpoint and reports the version, the authenticated account (if any), and any error from the App Server itself. If Test fails:
- Confirm Codex Desktop or the Codex CLI is actually installed at one of the paths PwrAgent scans.
- Confirm you’re authenticated — open Codex Desktop and check.
- Confirm the App Server binary is executable on your account
(rare, but Gatekeeper /
xattr -d com.apple.quarantinecan come into play on freshly-downloaded binaries).
AI Providers
Settings → AI Providers is the one screen for every coding agent PwrAgent can drive: Codex plus the Agent Client Protocol (ACP) backends. ACP agents are third-party executables that speak a coding-agent protocol; they are not raw model providers and they do not replace the built-in Codex backend.
Each provider row shows what PwrAgent discovered: every install it found (PATH installs, well-known directories, and any manual path you’ve added), which one is Using, version, license, distribution source, install state, and repository/website provenance where the registry provides it. The controls that matter day-to-day:
- Use — pin which discovered install a provider launches. The binary PwrAgent runs always matches the one marked Using.
- Manual path — point a provider at an install the discovery engine can’t see.
- Disable — a disabled provider is never probed (no surprise browser login windows from an agent’s own auth flow) and is hidden from the new-thread Backend picker.
- Capability metadata is cached, so opening Settings doesn’t launch every agent just to re-ask what it supports.
Installing an allowlisted agent
Uninstalled allowlisted providers are listed right on the screen. Install is a deliberate two-step flow:
- Click Review install.
- Read the source/trust disclosure and click Install.
PwrAgent supports npx, uvx, and platform binary distributions.
Package-manager entries are stored as command/argument descriptors
and launched without shell interpolation. Binary entries are installed
from the allowlisted archive source; checksum/signature metadata is
verified when present. If an allowlisted binary lacks integrity
metadata, Settings calls that out before install.
The access-mode boundary is intentionally narrow: PwrAgent can mediate ACP filesystem and terminal requests that pass through the client protocol, but it cannot sandbox what a third-party agent process does internally outside those requests. Install only agents whose source and behavior you trust.
Contributor-facing implementation details live in the repository at
docs/acp-registry-backends.md.
Current providers
| Provider | What it is | How you get it |
|---|---|---|
| Codex | The built-in backend. | Discovered from Codex Desktop / the Codex CLI — see Models / Codex App Server. |
| Gemini ACP | Google’s Gemini-based coding agent, exposed through ACP. | Review install → Install, or auto-discovered from an existing install (Homebrew and user-bin installs preferred). |
| Kimi ACP | Kimi Code CLI from Moonshot, exposed through ACP. | Review install → Install, or auto-discovered from $PATH / ~/.kimi-code/bin/kimi — same backend, no second copy. |
| Grok CLI | xAI’s Grok Build coding agent, exposed through ACP. | Auto-discovered locally, with a custom-path override. |
| Qwen Code | Alibaba’s Qwen coding agent, exposed through ACP. | Auto-discovered, with a configurable path. |
Enabled providers show up in the Backend picker on the desktop launchpad and in messaging’s new-thread flow (see Using Codex via Messaging → New Thread starter).
Operator-facing wrinkles worth knowing:
- Mode mapping is per-agent. Codex exposes the Default and Full Access modes you set on the Start Card. ACP agents map their own runtime modes through the same picker — each agent reports its native mode set over ACP, and PwrAgent presents one runtime-mode selector per thread. For agents whose “full access” is a CLI-side control (Grok CLI’s always-approve, for example), PwrAgent drives that control for you when you flip the Permissions cycle.
- Environments work across backends.
.codex/environmentssetup hooks and command gating run for ACP threads the same as Codex threads — pick an environment on the launchpad and the setup hook fires before the first turn regardless of which agent you picked. - The legacy direct-xAI Grok backend (PwrAgent’s original built-in Grok, driven by an xAI API key rather than the Grok CLI) is hidden behind an experimental flag. The Grok API key field under Settings → Models applies only to that legacy backend — Grok via the Grok CLI needs no key in PwrAgent.
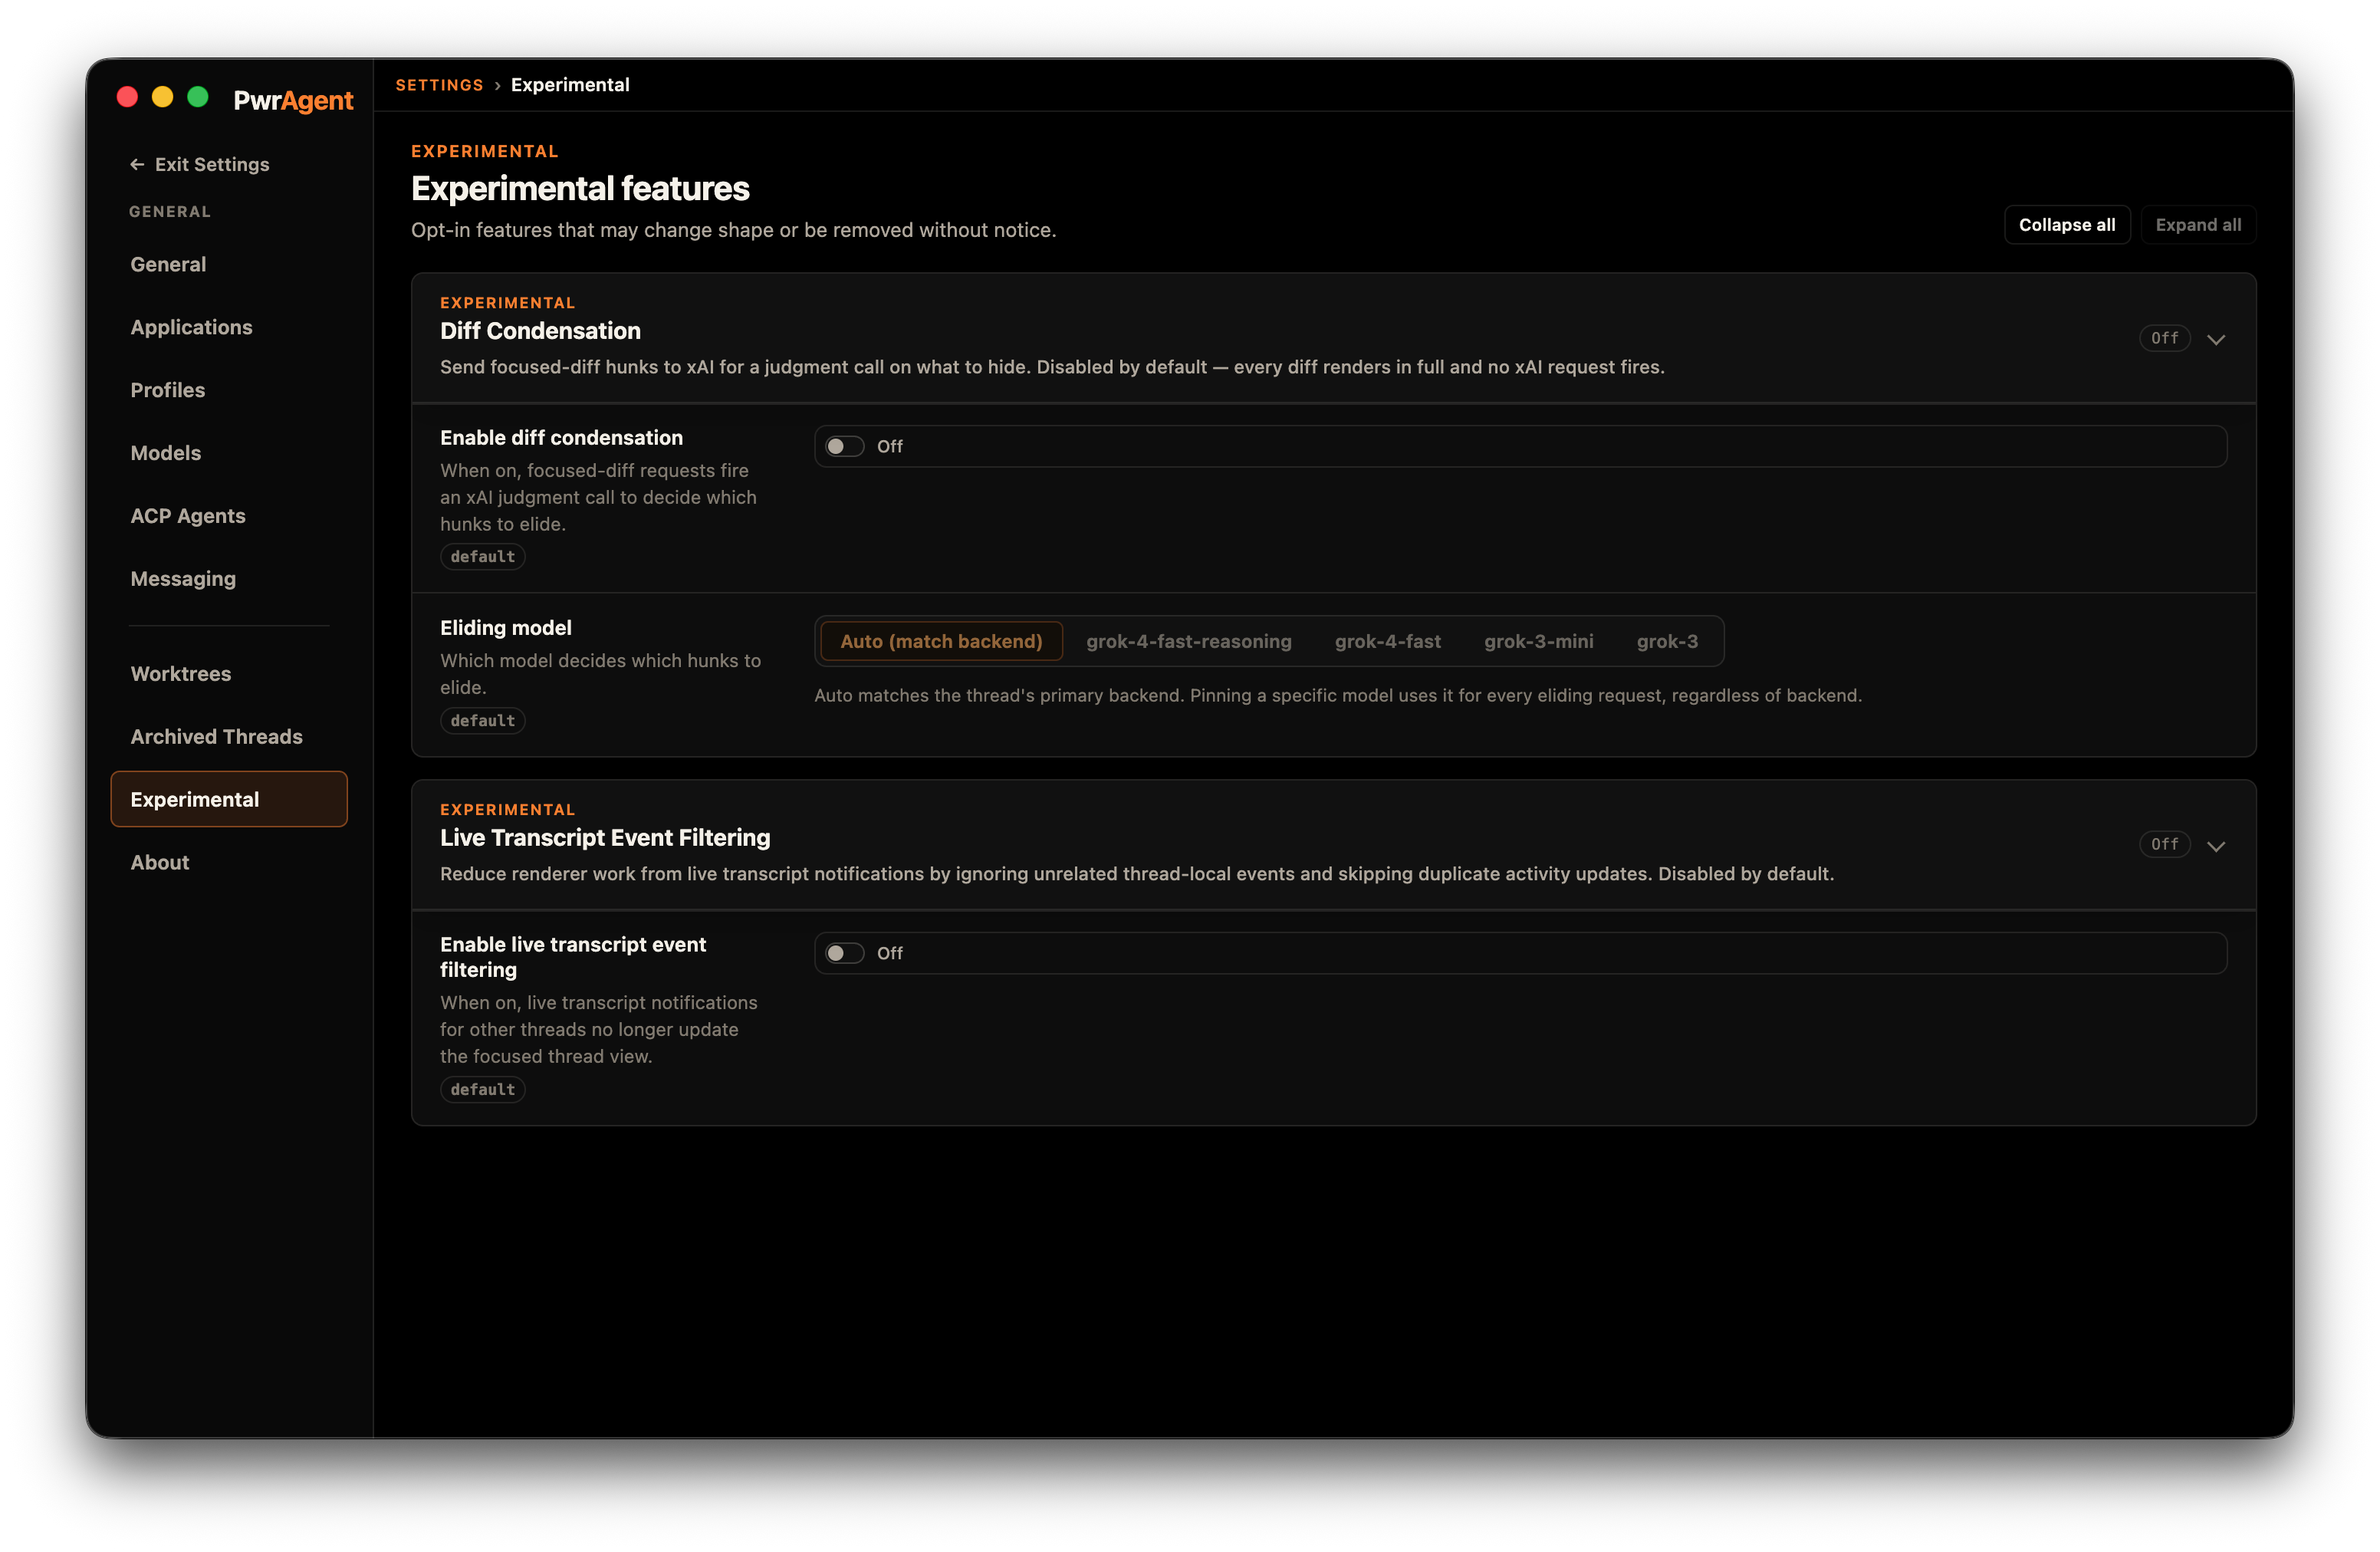
Experimental
Features that may change shape or be removed without notice. The panel currently hosts:
- Thread Pricing Summary (on by default) — the Pricing tab in the thread context rail. Sub-toggles: Display USD (estimated from OpenAI API list prices; on by default), Display Codex Credits (estimated from Codex’s token-based credit rate card; off by default), and Display tool output accounting (tool-output volume + noisy-polling alerts in the Pricing panel; off by default — collection stays on either way, the toggle only controls display).
- Lightweight Navigation Refresh (off by default) — cheaper thread-list polling while the window is focused.
- Codex Skill Questions (off by default) — lets Codex skills pause an ordinary turn to ask you a structured question, when the installed Codex build supports it.
And a Soon to be discontinued group for features being phased out:
- Diff Condensation — xAI-judged elision of oversized diff payloads.
- AgentCore – Grok — the legacy direct-xAI Grok backend (superseded by the Grok CLI provider; see AI Providers).
- Live Transcript Event Filtering — filters unrelated live events so background threads don’t churn the open transcript.
Features cycle through this panel before promotion — Thread Pricing Summary is already on by default while its coverage is validated.
See also
- Desktop — the app’s overall feature set, workspaces (Local vs. Worktree), per-thread model / fast / reasoning / permissions, multi-profile model.
- Messaging — messenger-specific Settings panels live under each provider setup page.